
A car is a second home for many people. However, long road trips, daily commutes, shopping runs, and hauling pets and children can easily mess up the look and feel of your car upholstery. Luckily, you can obtain professional results by cleaning it from the comfort of your garage or driveway!
So, what are some DIY ways of cleaning car upholstery? The best DIY method to use to clean your car upholstery depends on whether the interiors of your car are made of leather, fabric, or vinyl. In each of these cases, you can create a homemade solution with ingredients readily available in every household. After applying the solution, vacuum the hard-to-reach spots in your vehicle and add an air freshener.
If you are not an expert car detailer, you might think that this is all easier said than done. But don’t fret just yet! Through the different sections of this article, we are going to have a look at the best methods to clean your car. As well as the products to use, don’t miss out on exclusive tips for a lush last touch before you go!
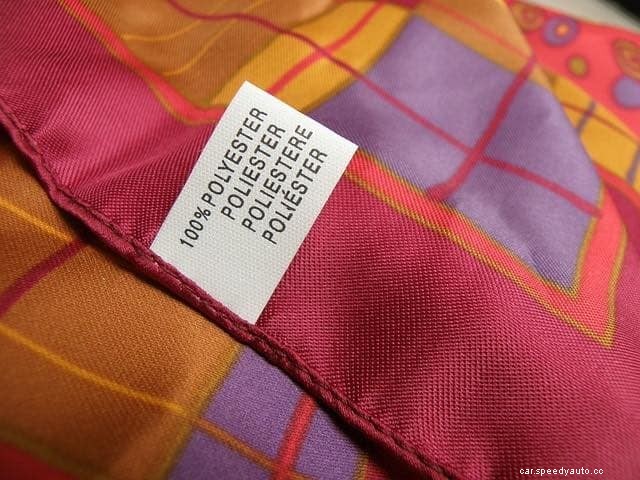
Fabric seats are the most common types of car upholstery found out there. However, the technology used for these fabrics changes rapidly, and today you can choose from several different types. Depending on the type of cloth upholstery you are dealing with, you will need different cleaning products.
The most common kinds of fabric upholstery on the market are:
Now you have an idea of what is expecting you ahead. In the sections below, you can find out what is the best method and tips for cleaning your Nylon or Polyester (microfiber) seats.
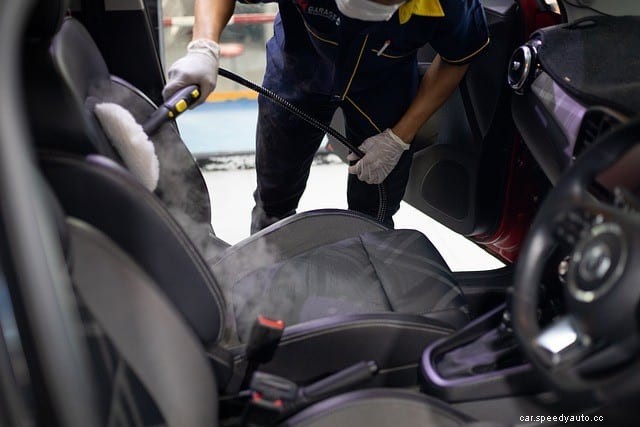
Of course, when you bring your car to a detailer, a professional will use specialized commercial upholstery cleaning products. However, if you decided to do the job yourself, the chances are that you are not that willing to splash away money on pricey sprays. Instead, by preparing the blends listed below, you can get the interior of your car to shine even on a tight budget!
Here you can find three different recipes for a homemade cleaner for fabric upholstery.
Now that you have decided on the best product to use on your car seats, let’s have a look at how to apply it safely for the best results!
Aside from the cleaner you have picked, you will need to gather:
After collecting these materials and tools, you are now ready to go. Here are the steps to follow:
Vinyl is one of the most loved materials by drivers who like their cars to have a unique character! Vinyl is a kind of synthetic plastic material that derives from a mix of petroleum, salt, and other natural gasses. This kind of fabric is extremely durable and resistant to spills and liquids, such as alcohol and even oil. On the market since the 1930s, you can today find vinyl seats in a massive range of colors and shapes. And of course, the fact that this is one of the most accessible materials to clean has played a significant role in making Vinyl extremely popular.
When it comes down to cleaning such material, you should take into consideration some fundamental aspects of this synthetic fabric. Indeed, it might be highly resistant to spills, but it can show adverse reactions if treated regularly with strong chemicals. Before starting the cleaning procedure, it is essential to check the manufacturer’s instructions. These guidelines will give you an idea of what to use and avoid to preserve the beauty of vinyl seats.
However, let’s be truthful if you have a slightly older car, the chances are that this vital piece of paper has been missing for a while!
In this case, you can check with a car detailer first to find some suggestions on what substances to buy to clean your vinyl seats. Alternatively, opt to stick to the method we have listed below as they avoid harsher chemicals altogether.
The recipe for a homemade cleaning solution for vinyl seats is reasonably straightforward, and you can blend it successfully at home with a few ingredients. However, it is essential to note that you should avoid any scrubbing or scratching materials that can easily damage the outer surface of your seats.
Before exploring what you will need to clean your seats properly, here are the substances that you should avoid altogether. These compounds can easily lead to breakage and discoloration of the Vinyl.
Instead, you should focus on collecting these items below before starting the cleaning procedure.
Before diving into the best process to clean Vinyl from the comfort of your garage, you should be aware of a couple of tips that can make your life easier in the future. First off, since you won’t be able to use particularly harsh substances and chemicals on these surfaces, you should try to avoid dirt accumulation.
To do so, manufacturers and professionals recommend to lightly clean the vinyl seats regularly, as soon as you notice any change in color or feel. In case you got there too later and there is a spot that won’t go away, no matter how much you clean it, you should opt for specialized vinyl cleaners. While sometimes pricier, you might even opt for boat seat cleaners, which can take great care of the synthetic fabrics in your car.
To clean your seats, you should follow these steps:
By following this method, you should be able to eliminate most of the debris that can accumulate in your car after prolonged use. However, the key to having healthy vinyl seats throughout the years resides in proper care and maintenance. To avoid saying goodbye to your classy seats too soon, you should:
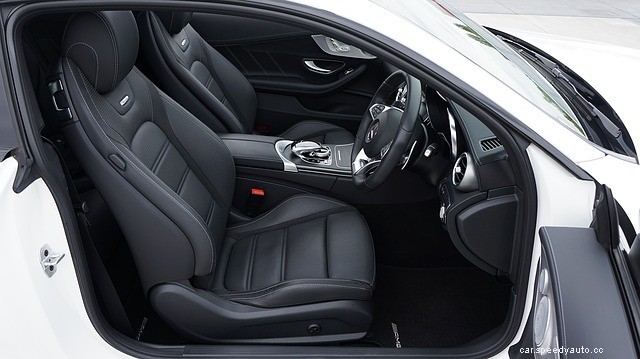
Leather car seats can give your car a lavish look that you won’t get with any other kind of seats. However, cleaning them at home can be quite tricky and can present many obstacles. Even in this case, proper maintenance is essential to see painful signs of wear and tear on your beloved car seats’ surfaces.
If you have opted for leather upholstery, it is recommendable to invest a little more and bring your car to an expert detailer. However, this might not always be an available option. Instead, you can opt to clean them at home with a DIY method that won’t ruin their look.
Mixing a leather cleaner at home is not the most recommended options, but you can effectively create one by mixing:
Add them into a spray bottle and shake well before use. This blend aims at cleaning leather furniture such as sofas and armchairs rather than car seats. However, if you are dealing with mild dirt, it can be just as effective.
After your seats are sparkling clean, you can opt to add a leather conditioner to it. Such products aim at preserving the look and wellbeing of the surfaces while protecting them from the stress of everyday use. To make one at home successfully, you can use either baby soap, beeswax, or lemon essential oil.
In any case, you should spot-test any product you are about to use on a less-visible area of your seats and wipe it off after a few seconds. After the moisture dries, if the section does not show signs of damage, you can proceed to clean the rest of the surface with it.
Other tools that you need to clean leather seats include:
As for vinyl seats, it is essential to clean your leather seats regularly and as soon as you notice any dirt or grime. Since you won’t be able to use harsher chemicals on the surface, it is best to avoid stains and spots from penetrating the fabric. If this happens, you might need to bring your car to a professional detailer to restore the lavish look of your seats.
Cleaning leather seats
Conditioning the leather

Spot cleaning should not replace a proper, regular maintenance routine. However, sometimes it can happen to spill juice or coffee on a perfectly clean car. In this case, spot cleaning comes in your help! If you are not too happy about spending money on professional products, you can create an effective DIY mixture at home with natural products.
For this task, you will need to gather only materials that are widely accessible in any household. However, you should refer to the instructions offered in this article while treating different kinds of upholstery. If you are dealing with a vinyl or leather can seat, it is recommendable to bring the car to a professional detailer as harsher chemicals might ruin your seat’s surfaces. Instead, here we are going to have a look at how to treat spots and stains on fabric upholstery.
For this task, you will need:
Prepare your homemade mix by adding in a spray bottle about ½ liter (2 cups) of water, 250 milliliters (1 cup) or vinegar, and a few drops of mild dish soap. For the car owners who are not fans of the smell of vinegar, you could opt to apply some lavender essential oil. Shake thoroughly, and you are ready to go!
It is easy to underestimate the damage that water and raindrops can cause to fabric upholstery. It’s just water, right!? However, there is nothing more painful than ending up with stained seats in your Mustang because you left the window slightly open during a rainy night! To get rid of the most stubborn water stains on fabric seats, you should collect:
After vacuuming the area, spray the dry foam onto the seats. Instead of focusing on a limited location, spray the foam across the seat. Gently rub the foam against the fabric surface as a too-hard motion can damage the surface. Use a towel that is dry and clean to wipe off the dry foam from the seat and allow it to dry.
Now your seats are in their best shapes, and you can enjoy the pleasant smell coming from your car! However, there are a couple of final touches that can genuinely make a difference in how splendid your car will look!
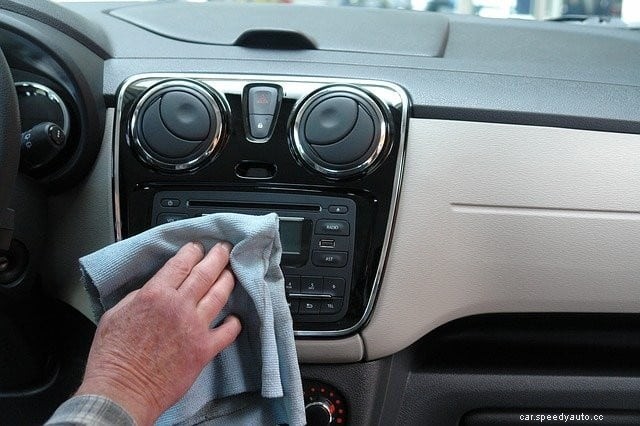
After cleaning your seats, you should not forget about vacuuming the rest of the car, including floor, pockets, and mats. These parts can suffer from the accumulation of dirt, dust, food scraps, and they might not be as hygienic as you wish they were. You can proceed to clean these areas with the methods we have seen above, but you should emphasize vacuuming them thoroughly.
After vacuuming the floor of your car, remove the mats and loose pieces of your car upholstery and treat them separately. Since they can become particularly dirty, you might need them to wash them properly and repeat the process a couple of times. Proceed to apply a homemade vinegar solution before scrubbing them thoroughly. Rinse them with a hose and give them time to dry outdoors before reinserting them into the car.
Add a DIY air freshener to the interior of your car before taking it for a test drive! Many drivers find air freshener annoying and disgusting due to the strong smell that they produce and the chemicals contained in them. Creating your own from natural ingredients and essential oils allows you to pick the scent you prefer the most. Another incredible benefit of trying out your crafting skills is that you can ensure that neither your or your family is inhaling dangerous chemicals while in the car.
There is nothing better than jumping in your car only to find it perfectly clean and good-smelling. However, if you are not too happy about paying a detailer to get your car shiny and stainless, you could opt to clean the upholstery at home with some smart DIY methods. Fabric upholstery, such as nylon and polyester, are materials easy to clean with products that are available in most households.
These materials are also more resistant to chemicals and scrubbing, so you won’t have a problem while treating them at home. However, if you are lucky enough to enjoy leather and vinyl seats in your car, you might need to consider whether it might be worth taking a trip to the detailer. Indeed, these materials need constant maintenance, and, in the case of more stubborn stains to treat, you might end up damaging the surface. Don’t forget to spot-test any of your DIY cleaning products before spraying it on the seats!
