 1
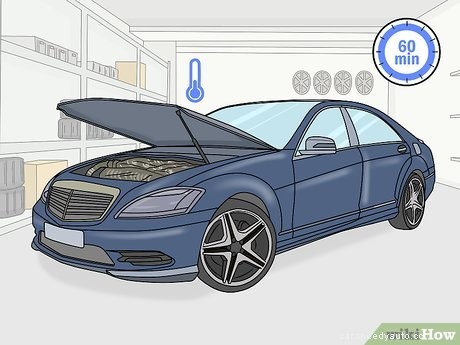
Wait for the engine to cool down if you drove recently. As you drive your vehicle, the coolant running through the engine heats up and could cause severe burns. Before you make your repairs, give your vehicle 30–60 minutes so it can cool off. To check the temperature, open the hood and lightly touch your engine to see if it feels hot. If it’s cool to the touch, then you can work safely.
1
Wait for the engine to cool down if you drove recently. As you drive your vehicle, the coolant running through the engine heats up and could cause severe burns. Before you make your repairs, give your vehicle 30–60 minutes so it can cool off. To check the temperature, open the hood and lightly touch your engine to see if it feels hot. If it’s cool to the touch, then you can work safely.
 2
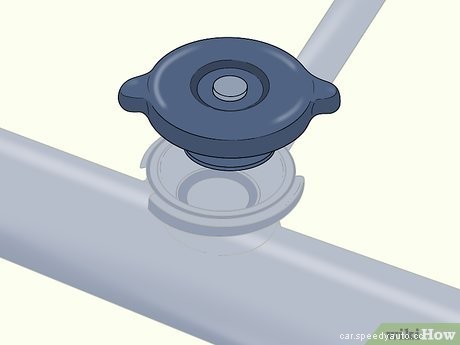
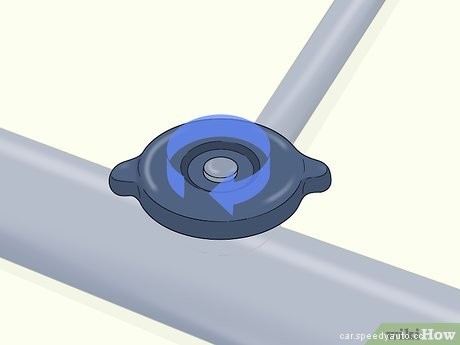
Take the cap off of your radiator. Locate your radiator, which is a long black box under your hood and in the front of your engine bay directly behind the grille. Look for a circular cap on top of the radiator and turn it counterclockwise to loosen it. Set the cap aside while you’re working so you don’t misplace it.
2
Take the cap off of your radiator. Locate your radiator, which is a long black box under your hood and in the front of your engine bay directly behind the grille. Look for a circular cap on top of the radiator and turn it counterclockwise to loosen it. Set the cap aside while you’re working so you don’t misplace it.
Variation: Your vehicle may have a clear plastic reservoir near the back corner of the engine bay that stores additional coolant. You can unscrew the reservoir cap instead of the radiator cap.
 3
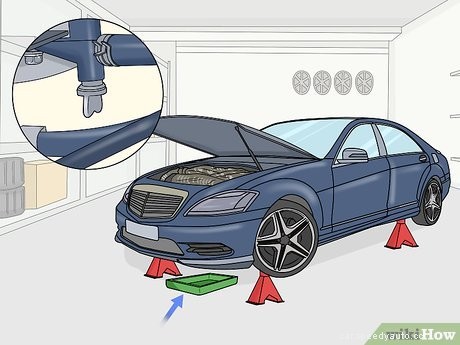
Put a drip pan underneath your radiator’s drain plug. Look underneath your vehicle at the bottom of the radiator and look for a small plastic wingnut or plug. Slide a drip pan directly under the plug so your coolant doesn’t spill everywhere or make a mess while you’re working.
3
Put a drip pan underneath your radiator’s drain plug. Look underneath your vehicle at the bottom of the radiator and look for a small plastic wingnut or plug. Slide a drip pan directly under the plug so your coolant doesn’t spill everywhere or make a mess while you’re working.
 4
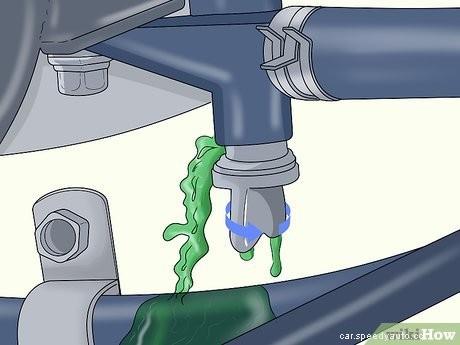
Drain half of the coolant out from your radiator’s drain valve. Turn the drain plug on your radiator counterclockwise until you see a steady stream of coolant pour into the drip pan. Check the levels of the coolant by looking into the radiator. You only need to remove enough coolant to expose the thermostat, so once half of the coolant flows out from the plug, turn it clockwise to tighten it again.
4
Drain half of the coolant out from your radiator’s drain valve. Turn the drain plug on your radiator counterclockwise until you see a steady stream of coolant pour into the drip pan. Check the levels of the coolant by looking into the radiator. You only need to remove enough coolant to expose the thermostat, so once half of the coolant flows out from the plug, turn it clockwise to tighten it again.
 5
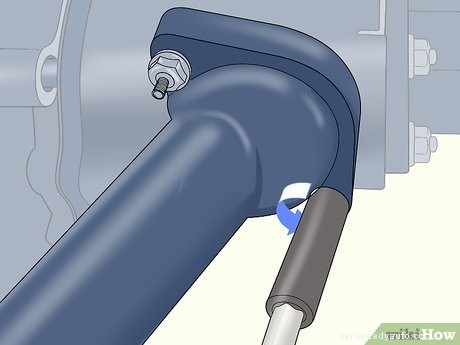
Unbolt the thermostat housing from the engine block with a ratchet. Follow the hose from the top of your vehicle’s radiator to the side of your engine. Where the hose connects to the engine will be the housing for the thermostat. Find the 2 bolts on each side of the housing’s flange and turn them counterclockwise with a ratchet. Once you loosen the bolts, you can easily lift the housing up to detach it from the engine.
5
Unbolt the thermostat housing from the engine block with a ratchet. Follow the hose from the top of your vehicle’s radiator to the side of your engine. Where the hose connects to the engine will be the housing for the thermostat. Find the 2 bolts on each side of the housing’s flange and turn them counterclockwise with a ratchet. Once you loosen the bolts, you can easily lift the housing up to detach it from the engine.
 6
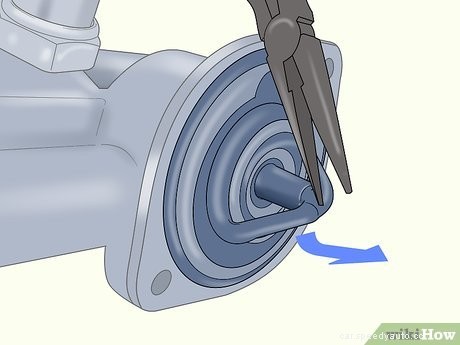
Pull the old thermostat out with a pair of pliers. Check the port on your engine where you removed the housing to locate the thermostat, which looks like a cylinder with a metal ring around the outside and a pointed valve on top. If you don’t see the thermostat in the engine port, it may be stuck in the housing end with the hose. Grip the top of the thermostat with the pliers and pull it straight out. If the thermostat feels stuck, try twisting it as you pull it out.
6
Pull the old thermostat out with a pair of pliers. Check the port on your engine where you removed the housing to locate the thermostat, which looks like a cylinder with a metal ring around the outside and a pointed valve on top. If you don’t see the thermostat in the engine port, it may be stuck in the housing end with the hose. Grip the top of the thermostat with the pliers and pull it straight out. If the thermostat feels stuck, try twisting it as you pull it out.
 1
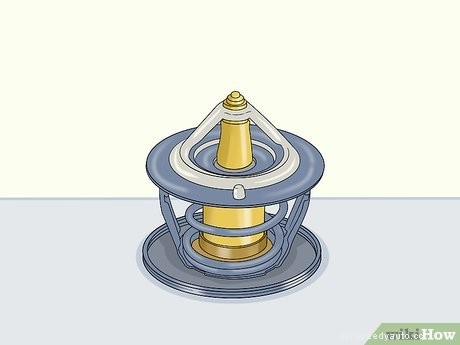
Get a replacement thermostat and gasket with the same heat rating. Look around the thermostat’s ring for a temperature listing, which is when the thermostat opens and allows coolant to pass through the engine. Look at an automotive store for a thermostat that lists the same opening temperature, or else your vehicle may not operate properly. Then look for a thermostat gasket that matches the shape of the housing’s flange so the coolant doesn’t leak while your vehicle runs.
1
Get a replacement thermostat and gasket with the same heat rating. Look around the thermostat’s ring for a temperature listing, which is when the thermostat opens and allows coolant to pass through the engine. Look at an automotive store for a thermostat that lists the same opening temperature, or else your vehicle may not operate properly. Then look for a thermostat gasket that matches the shape of the housing’s flange so the coolant doesn’t leak while your vehicle runs.
 2
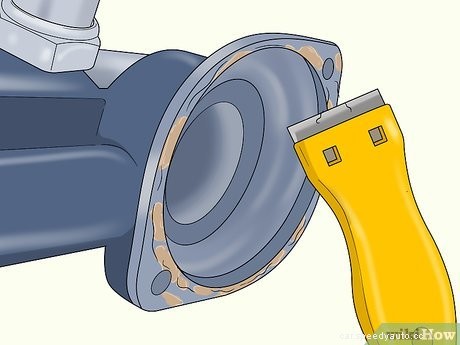
Remove any residue from the housing and engine flanges with a scraper. Hold your scraper against the housing flange at a 45-degree angle. Use light pressure to scrape off the residue that was leftover from the old gasket. Keep cleaning the flange until it’s smooth. Then scrape the flange on the engine.
2
Remove any residue from the housing and engine flanges with a scraper. Hold your scraper against the housing flange at a 45-degree angle. Use light pressure to scrape off the residue that was leftover from the old gasket. Keep cleaning the flange until it’s smooth. Then scrape the flange on the engine.
 3
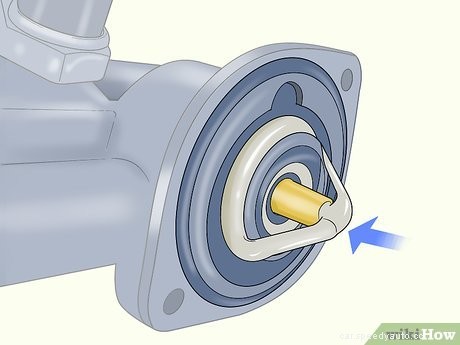
Put the thermostat in the engine flange so the valve points up. Inspect your new thermostat to find the pointed valve on top and the spring on the bottom. Slide the thermostat into the port on your engine and push it in tightly. Make sure the thermostat’s ring fits perfectly in the port, or else coolant will be able to leak through.
3
Put the thermostat in the engine flange so the valve points up. Inspect your new thermostat to find the pointed valve on top and the spring on the bottom. Slide the thermostat into the port on your engine and push it in tightly. Make sure the thermostat’s ring fits perfectly in the port, or else coolant will be able to leak through.
 4
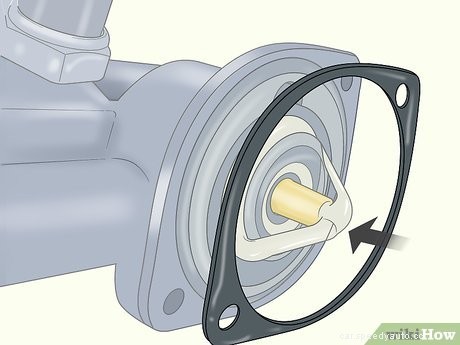
Line the new thermostat gasket up on the flange. Your gasket will look like a flat piece of plastic or rubber that’s the same shape as the flanges. Put the gasket on top of the engine’s flange and line up the holes. Make sure you don’t block any of the holes or ports, or else the thermostat won’t work properly.
4
Line the new thermostat gasket up on the flange. Your gasket will look like a flat piece of plastic or rubber that’s the same shape as the flanges. Put the gasket on top of the engine’s flange and line up the holes. Make sure you don’t block any of the holes or ports, or else the thermostat won’t work properly.
Variation: Depending on your vehicle’s make and model, you may need to install a circular gasket directly on the thermostat instead of setting one on the flange. Fit the thermostat’s ring into the groove running through the middle of the gasket before installing the thermostat.
 5
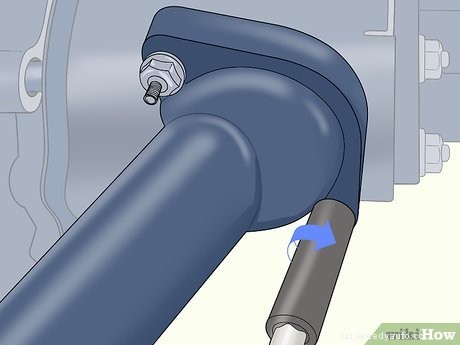
Bolt the housing back onto the engine. Set the housing on top of the gasket so the bolt holes line up. Turn the bolts clockwise by hand until they’re tight. Then use your ratchet to tighten the bolts until you feel resistance. Look up the torque specifications for your make and model of vehicle and only tighten the bolts by that amount.
5
Bolt the housing back onto the engine. Set the housing on top of the gasket so the bolt holes line up. Turn the bolts clockwise by hand until they’re tight. Then use your ratchet to tighten the bolts until you feel resistance. Look up the torque specifications for your make and model of vehicle and only tighten the bolts by that amount.
 1
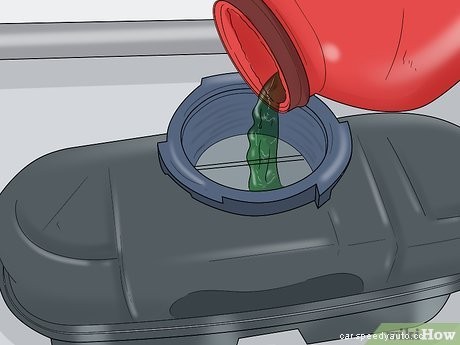
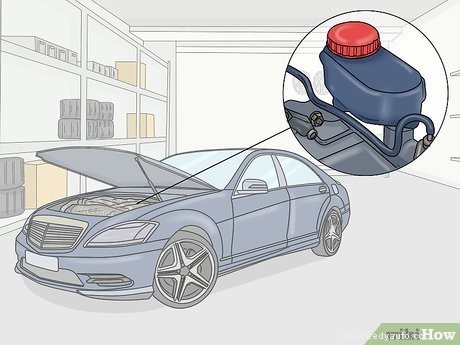
Pour coolant into the reservoir up to the fill line. Locate the plastic coolant reservoir near the side or back corner of the engine bay. Open the cap and pour in the coolant you originally drained into the drip pan. If the coolant was dirty, then look up the coolant specifications for your vehicle and get a new bottle in the right color. Keep pouring the coolant in until it reaches the fill line on the side of the reservoir.
1
Pour coolant into the reservoir up to the fill line. Locate the plastic coolant reservoir near the side or back corner of the engine bay. Open the cap and pour in the coolant you originally drained into the drip pan. If the coolant was dirty, then look up the coolant specifications for your vehicle and get a new bottle in the right color. Keep pouring the coolant in until it reaches the fill line on the side of the reservoir.
Warning: Vehicle coolant is toxic and can give off harmful vapors, so be sure to work in a well-ventilated area.
 2
Screw on the radiator cap to seal it. Press the radiator cap back onto the opening on top of your radiator. Turn the cap clockwise to tighten it and seal the radiator so your coolant doesn’t splash or leak.
2
Screw on the radiator cap to seal it. Press the radiator cap back onto the opening on top of your radiator. Turn the cap clockwise to tighten it and seal the radiator so your coolant doesn’t splash or leak.
 3
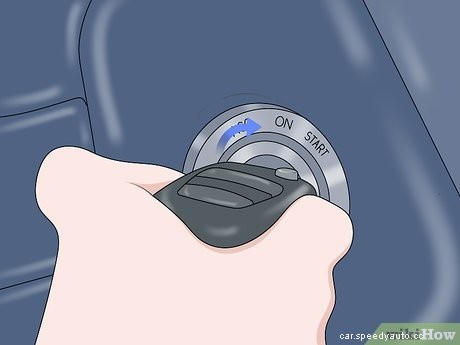
Start your vehicle’s engine to run coolant through the system. Turn the key in the ignition to run your vehicle’s engine. Leave the engine to idle for 5–10 minutes so the engine can warm up and activate your thermostat. As the engine runs, look at the thermostat housing to see if there are any leaks. After that, turn off your vehicle.
3
Start your vehicle’s engine to run coolant through the system. Turn the key in the ignition to run your vehicle’s engine. Leave the engine to idle for 5–10 minutes so the engine can warm up and activate your thermostat. As the engine runs, look at the thermostat housing to see if there are any leaks. After that, turn off your vehicle.
 4
Top off your coolant once your engine cools down again. Since the coolant will run into your engine and radiator, the levels may go down. Wait until your engine completely cools again so you don’t get burnt. Open the cap on the reservoir and check the coolant levels to see if you need to add more. Pour the coolant in until it reaches the fill line to ensure your engine doesn’t overheat.
4
Top off your coolant once your engine cools down again. Since the coolant will run into your engine and radiator, the levels may go down. Wait until your engine completely cools again so you don’t get burnt. Open the cap on the reservoir and check the coolant levels to see if you need to add more. Pour the coolant in until it reaches the fill line to ensure your engine doesn’t overheat.
