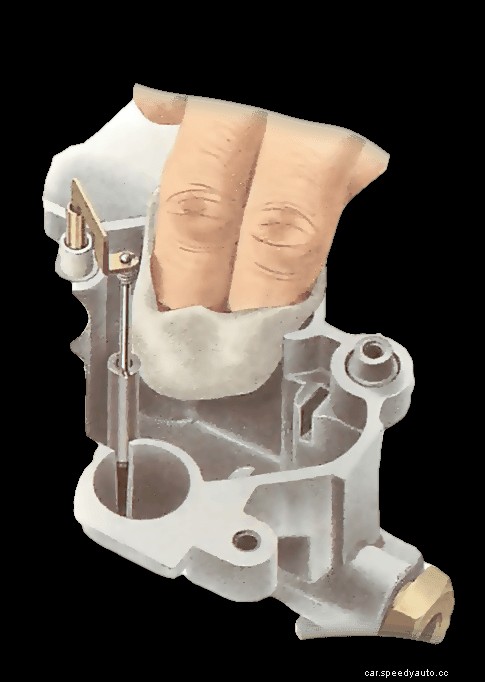
The Varajet carburettor used on many Vauxhalls and Opels is a hybrid between fixed-jet and variable-jet (for example, SU) types. It is as sensitive to dirt and sediment as any fixed-jet carburettor, and needs careful cleaning about once a year.
GM Varajet carburettor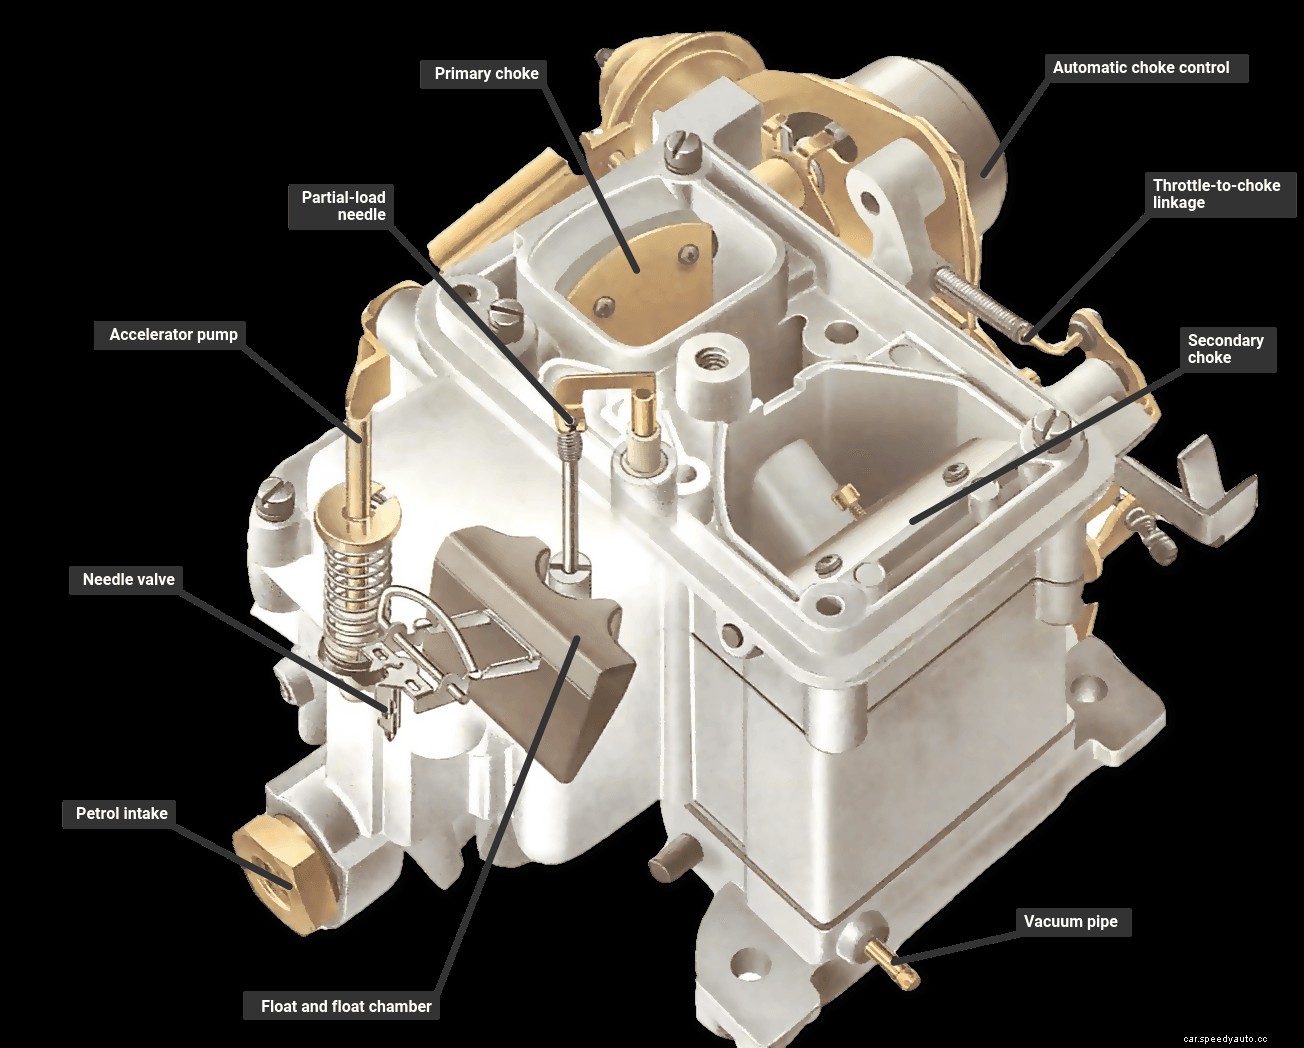
The Varajet has two chokes or barrels. The first, which works alone at low engine speeds, has a fixed- jet system. The second, which comes in at higher speeds, has a variable jet.
As with any carburettor, remove it from the car (See Removing a carburettor for cleaning ) for cleaning. Wash parts in petrol, using lint-free rags to wipe them. Renew all gaskets . After reassembly, oil the external moving parts.
The carburettor has the layout of a normal fixed-jet type, and is dismantled in much the same way.
Take the same precautions against dirt and the loss of small parts (See Checking and cleaning a fixed-jet carburettor ). Make notes or drawings of any parts dismantled, to aid refitting.
Try not to disturb the settings of adjuster screws, but if you do, ensure that you return them to their original setting by counting the number of turns taken to remove them.
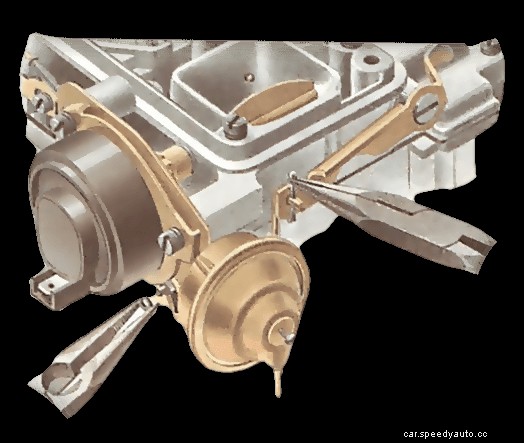
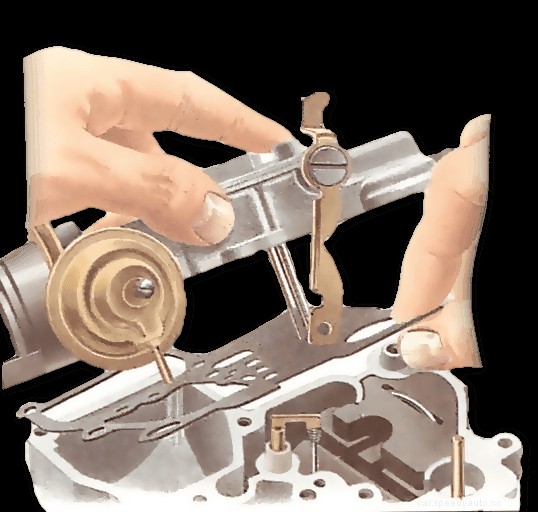
Disconnect the linkage between the throttle and the choke by straightening the split pin and pulling it out. Use a new split pin when you reassemble.
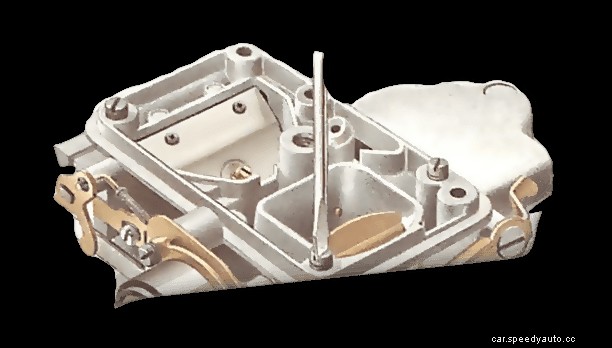
Remove the screws holding on the top and lift it off. Unlike most modern fixed-jet carburettors, the float is not hung from the top, and so stays in place. Be careful not to bend the various tubes protruding from the bottom.
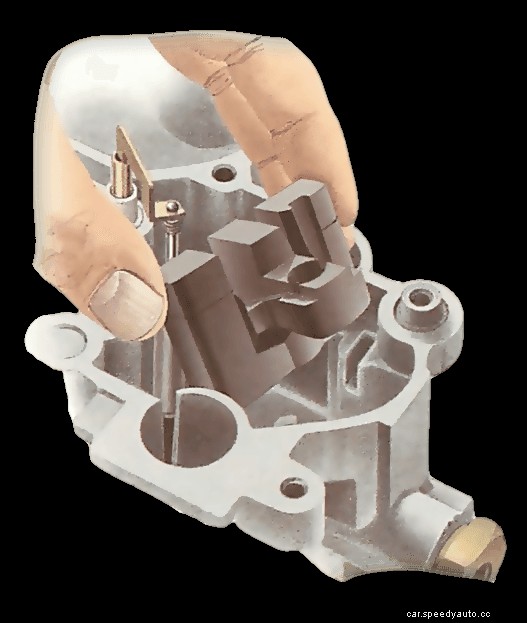
The accelerator pump , which has a spring under it, may jump out. If it does not, lift it out carefully. There is a ball under the spring which falls out when you turn the body over, so be ready to catch it.
There is also another, larger ball in the suction-valve spring housing next to the pump .
This will not come out unless you take the screw out above it and extract the spring with very long-nosed pliers. Do not do this unless you have to inspect a broken spring or a blocked jet under the ball.
Peel off the old gasket, making a note of how it fits so that you can fit the new one in exactly the same way.
Lift out the upper packing piece. Examine the float valve to see how the valve spring hooks on to its platform.
Unhook the spring and remove the float pivot clip so that you can lift the float out. The needle will come too, hanging from the end of the float. Lift it off.
Pull out the lower packing piece to leave the float chamber empty.
Rinse out the chamber with a little petrol and wipe it clean with a lint-free rag. Remove all sediment, but do not bother about surface staining.
When refitting the float, remember to hook the valve spring back into place. The float level is not adjustable.
As with any carburettor, the various parts are a precision-fit, and care must be taken to handle every part gently.
Before finally tightening the screws holding the carburettor top, ensure that the accelerator-pump piston moves freely.
 Check the float
needle valves
for wear. Both the needle and its seating should last for several years, but when either gets worn there may be persistent
flooding
. If necessary, fit a new valve; on some carburettors the valve is not renewable - fit an exchange carburettor.
Check the float
needle valves
for wear. Both the needle and its seating should last for several years, but when either gets worn there may be persistent
flooding
. If necessary, fit a new valve; on some carburettors the valve is not renewable - fit an exchange carburettor.
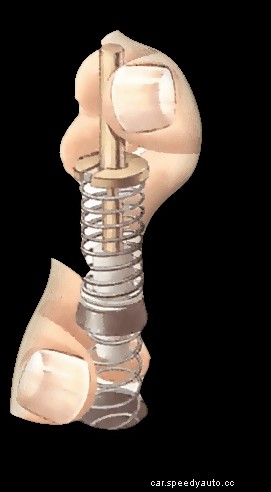
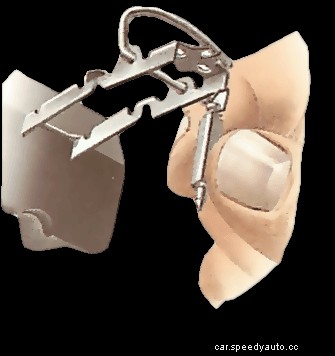
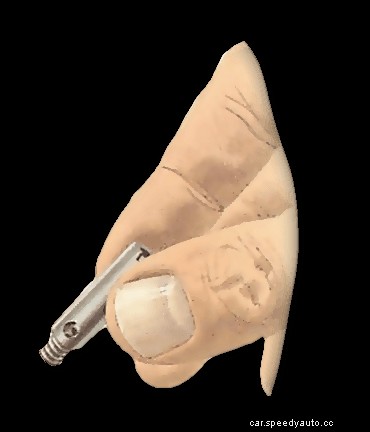
This needle moves up and down in a drilling midway between the two barrels of the carburettor. It is moved by a piston beside it, connected by a link at the top.
The needle is very easily bent, so disconnect the link before removing either the needle or the piston.
Push down the spring under the ball head of the needle. Lift the head slightly to free the link. Push the link aside.
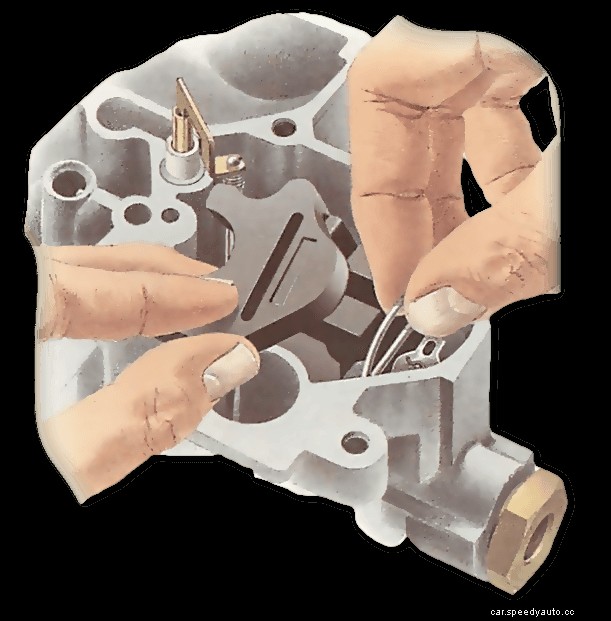
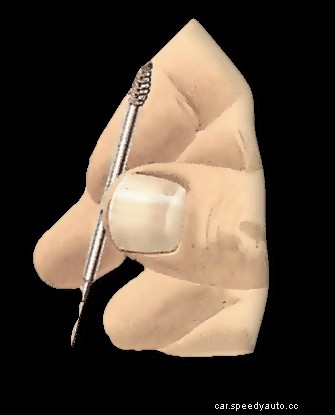
Lift the needle out carefully. Unscrew the jet into which it fits using a snug-fitting screwdriver. Check both needle and jet for wear, which would cause erratic running and waste fuel . Signs of wear will show as minute groves in the jet or on the needle or bright spots on the side of the needle. Replace them if there is the slightest sign of wear, also if the needle is bent.
When replacing the needle, guide it carefully into the jet. Reconnect the link to the top of the piston.
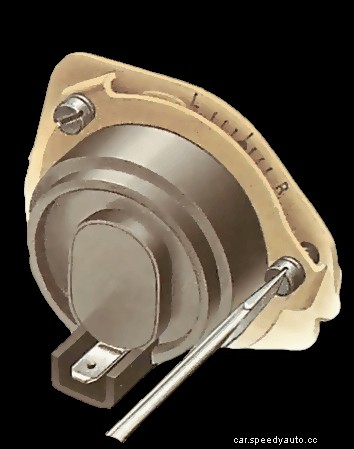
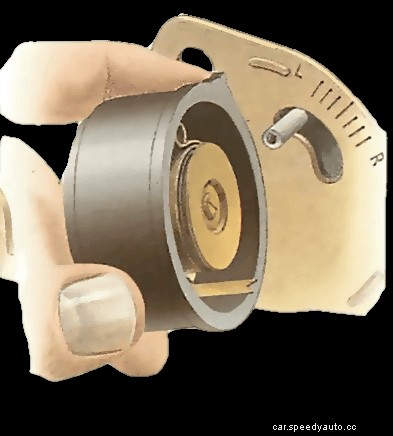
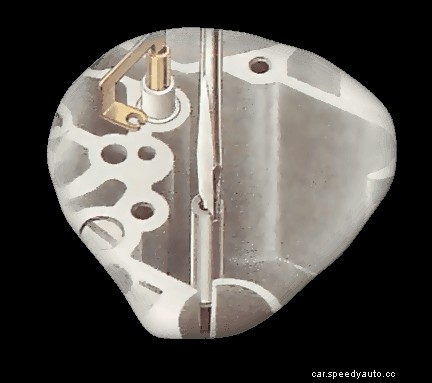
The choke setting is adjustable for summer or winter. The adjustment is made by moving a pointer attached to the choke body along a graduated scale . An average setting for all seasons in Britain is one one mark to the right of the centreline. In very cold weather move the pointer further towards 'R' (rich) and in hot weather towards 'L' (lean). Loosen the three surrounding screws to make the adjustment and retighten them after changing the setting.