Consequently, doing your own engine bearing replacement, can be very gratifying and give you a good sense of accomplishment.
So, problems with engine bearings will usually result in, some sort of knocking noise coming from your engine. Consequently, the type of knocking noise that you hear; will usually give you a good idea of which engine bearing is faulty or needs to be replaced.
1. Especially relevant before disassembly. Number each connecting rod and matching cap, according to cylinder location. And, each main bearing cap, as to its location in the block.
2. Loosen cap screws and lift main bearing caps, until free from block. Use cap screws as a lever to free stubborn caps.
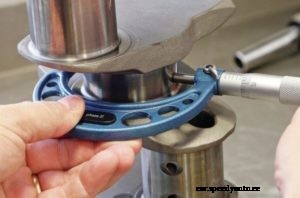
3. Measure housing bore dimensions, with a dial bore gauge or inside micrometers.
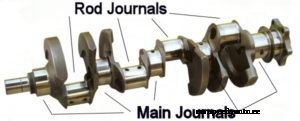
4. Use a micrometer to measure size, roundness and taper of the crankshaft. This is vital, during engine bearing replacement.
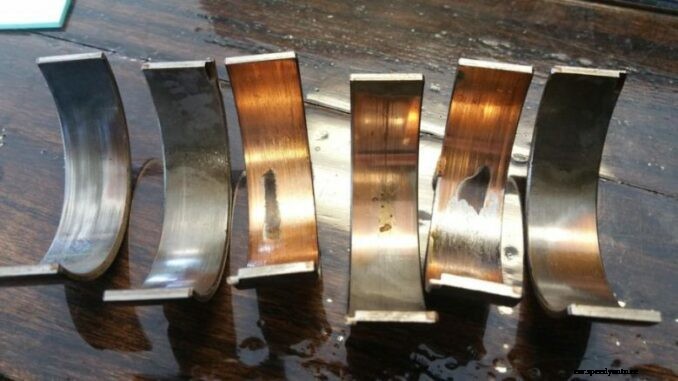
5. One method to check the surface finish of a crankshaft is to rub a one cent coin; several times across the surface of the shaft. If the shaft picks up copper from the coin, the shaft is too rough and must be reconditioned.
6. Also, any burrs found at the oil holes of the crankshaft, must be removed, using a stone, file or scraper.
7. All oil passages must be clean. Clean these passages with a brush and solvent. You can also use clean, dry, compressed air.
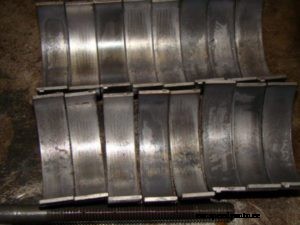
8. Select the correct part number and under size bearing, to suit the, engine bearing replacement application.
9. Using a clean, lint-free cloth, wipe bearing back and bore surfaces. Above all, they must be clean and dry. Furthermore, never put anything between the bearing back and bore surface.
11. All rubber crankshaft seals must be installed, with the sealing lip pointing toward inside of engine.
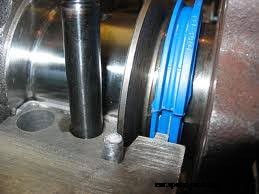
12. Always, use a good supply of lubricant, on all bearing surfaces and seal lip during, engine bearing replacement.
13. Place the crankshaft gently and squarely onto the main bearings. Install main caps in proper position.
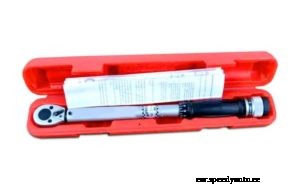
14. All threads must be clean and lightly lubricated, to obtain accurate torque readings. Finally, tighten all bolts and cap screws, with a torque wrench to proper torque specifications. Do not attempt to guess at torque tightening.
15. In addition, with a feeler gauge of proper thickness; check clearance between crankshaft thrust disc and bearing flange surface.
16. Before installing piston and rod assembly, cover rod bolt threads with suitable protectors; to prevent nicking of crankshaft during, engine bearing replacement. A short piece of rubber hose is good for this purpose.
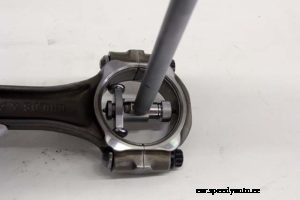
17. Place matching number cap on connecting rod. Finally, torque rod bolts to proper spec.
18. Priming the engine is most important. Consequently, this is to prevent dry start and premature damage to bearing surfaces.
Above all, the most important factor is lubrication. So, as long as there’s a steady flow of clean oil, the bearings will generally keep moving along fine. But, if the oil’s dirty or if the oil supply is cut off, that’s when bottom end problems start. Finally, at that point you need to decide if, engine bearing replacement is your best choice.
