After working on cars for so many years, I have found that some parts don't need to be replaced. They just need a quick cleanup or repair!
The 1989 Chevrolet is now considered a classic! So what does that mean to 1989 Chevy truck owners? If things haven't gone wrong by now, they will certainly start to!
It can be a challenge with these older models to keep up with the various parts that are wearing out after so many years of service.
On the one hand, yeah, it's a pain replacing parts. When one is replaced another one goes bad, and that starts to hang on your last nerve after a while.
But, on the other hand, these parts are thirty years old! Obviously they are solid components. You can expect a good long life from the new parts you put in.
Replacing parts can become expensive, especially if several need replacing within a short period of time.
Sometimes a part you thought needed to be replaced really only needs some tender loving care to get it back to work. The secondary air pump can be one of those parts.
I'll show you what I did to get the secondary air pump working just fine again.
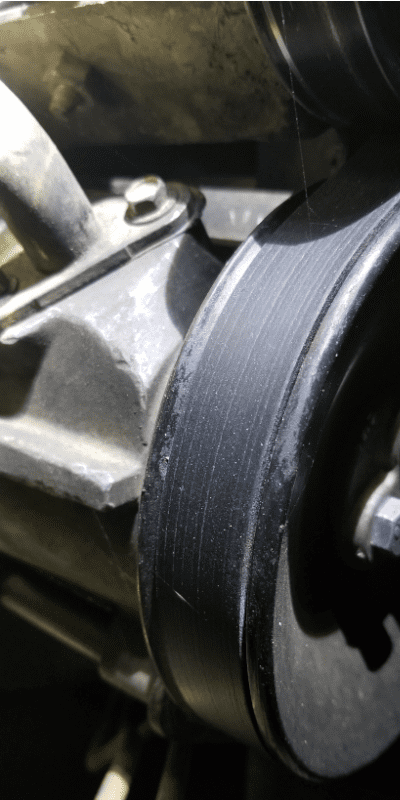
The secondary air pump, pictured above and below, helps burn fuel in the exhaust exhaust by forcing air into the system before the catalytic converter.
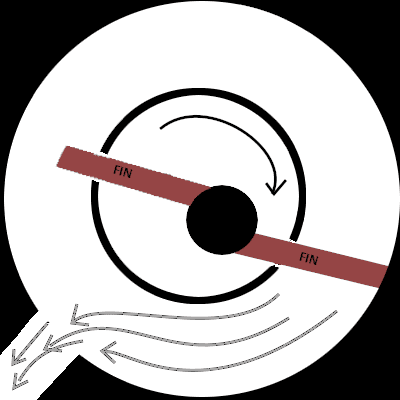
The secondary air pump is simply a fan inside of the container.
The secondary air system does a lot of work. Not hard work, but constant work.
These fins can only turn one direction. The edge is beveled to allow one direction of rotation. After thirty years of spinning in this one direction, they are well worn into their customary path.

The pump on this 1989 Chevy truck finally ceased after multiple misalignments with the power steering pump pulley. These misalignments would throw the serpentine belt off. Eventually the pulley simply stopped. The serpentine belt smoked as it spun around the secondary air pump by force of the engine still turning.
When the engine was turned off the serpentine belt was ruined and the secondary air pump pulley could not be turned by any means! It had to be removed and repaired.
My first thought was to replace the old pump with a new rebuilt pump. It sounds simple enough, until you try to find one! All of the parts to these older trucks are no longer produced. Rebuilt is the only option, if you can find a rebuild. This pump, it turns out, is very difficult to find.
There are several that are very similar, but the intake attachment is mounted on the back, whereas this model is mounted on the top.
As my frustration mounted trying to find this pump I started thinking, "What exactly happened inside of this pump anyways?"
If I have to buy a rebuild, why not rebuild it myself? The worst thing that could happen is I break it more than it already is.
There are only three bolts holding it together, so why not!
First I had to get the secondary air pump out of the engine. Removing it is a breeze (see photo gallery below):
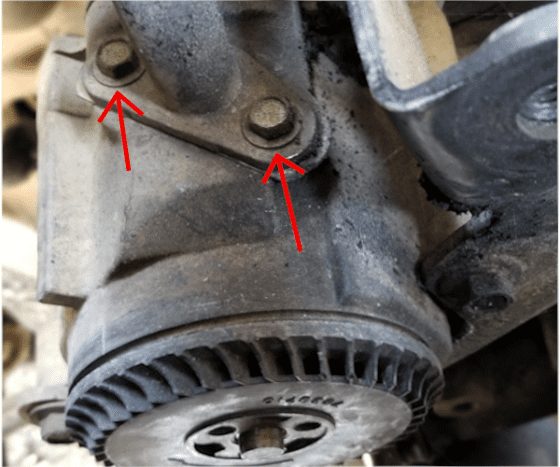


The bolts that need to removed.
1 / 5On the back of the pump are three bolts. Remove them and the back will slide out with the rod. That is all there is to it.
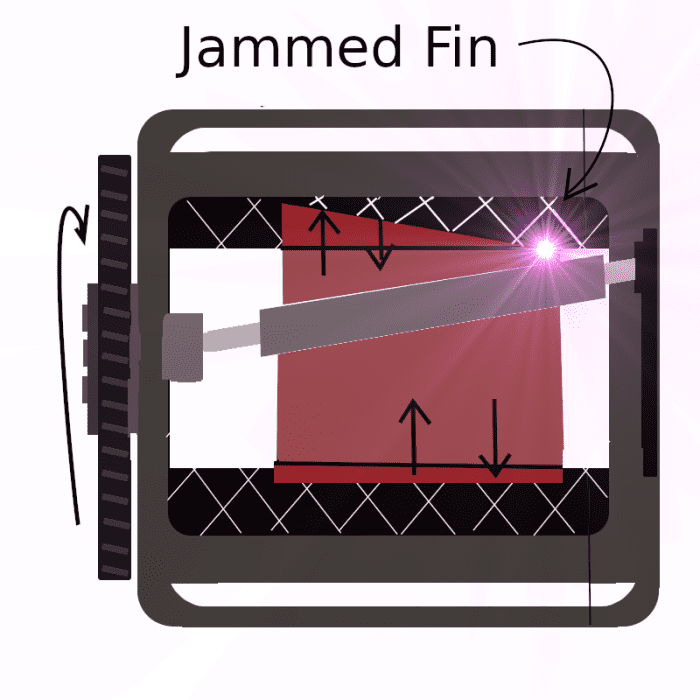
When I slid the back off, I saw the problem immediately. One of the fins had not gone through the slot properly and jammed itself. With the back off I was able to manipulate the cylinder until the fin came loose and was back in position.
The cylinder was dry with soot inside. The rod did not spin easily inside the cylinder so I went through and cleaned the back, inside the cylinder and the route of the fins. I added oil where parts were not moving smoothly.
Carefully sliding the back onto the front with the cylinder, I positioned the rod correctly inside the front piece, where it connects to the pulley on the outside, and replaced the bolts.
I was then able to turn the pulley on the outside without a problem.
Putting the secondary air pump back in was slightly more difficult than getting it out. The mounts are a tight fit and the bolt holes must be aligned before you can put a bolt through them. Be patient and you'll get it. Another pair of hands can be helpful too.
Once you have the mounting bolts back in attach the top intake (or rear mounting) to the pump with its bolts.
Put the pulley back on the pump, if you took it off. Make sure to use the special bolts that were originally in it. Torque to specification.
Replace the serpentine belt and attach the negative battery cable, and you're good to go!
This content is accurate and true to the best of the author’s knowledge and is not meant to substitute for formal and individualized advice from a qualified professional.
