A stuck oil drain plug is not that uncommon – like wheel bolts, people tend to overtighten them because they’re too afraid of the repercussions should it come off. Knowing how to properly unscrew and remove the drain plug can make a difference between a successful oil change, and an expensive oil pan replacement.
The best way to remove a stuck oil drain plug is to have a lot of leverage and anti-seize lubricant.
Because the space underneath the vehicle can be very tight, getting enough leverage is going to be a challenge, but in this guide, I’ll show you a couple of ways to do it. When working underneath a vehicle, safety is the number one priority, a fact I’ll repeat several times throughout the article.
The oil drain plug is nothing more than a hex-head bolt that threads into the oil pan to seal it. The vibrations can let a small amount of oil seep into the threads, sludge up and eventually create a sticky substance that will make it very difficult to unscrew the plug.
However, the much more common way of getting the oil drain plug stuck is to overtighten it – I’ll teach you how to properly tighten the drain plug once we get it unstuck.
Please make sure you’re safe when working underneath the car – you’ll be pulling, yanking, and hitting the plug and it can move the entire vehicle and pull it off the jack and stands. The best place to work on this job is a mechanic’s trench or with the car raised by a lift.
If you can’t gain access to either, find a tall curb in your neighborhood and drive up with one side of the vehicle. It’s not ideal, but it will give you sufficient room to maneuver without the risk of the vehicle falling down.
The last thing is to remember that bolts are unscrewed by turning them anti-clockwise. Righty-tighty, lefty-loosey. It seems trivial, but when you’re underneath the vehicle, it’s easy very easy to forget. It happens to me more often than I’d like to admit, so it’s better that I remind you than let you snap the bolt off.
You don’t need all of the items on the list, and you’ve likely used some of them to attempt to unscrew the plug. I’ve placed them in order of strength, from hand wrenches to the extra-long ratchet.
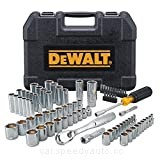
I prefer to use sockets over a classic wrench to unscrew the bolt, as it gives me more control. If you plan on getting the extra-long ratchet, make sure to match the drive of the ratchet to the socket set. The ones I’ve provided are compatible, so you won’t have to worry.
Because the plug is very tight, the anti-seize spray may not penetrate the gap as easily, but every bit of help is welcome. Spray the plug and wait for a few minutes, then use a piece of old cloth to wipe the top and sides of the nut to improve grip.
With the bolt lubricated as much as possible, you can try to unscrew it using a socket. Make sure the socket sits well on the bolt before you apply even, but a powerful motion to unscrew it. The one thing you don’t want to do is smooth out the bolt head because that’s going to be a very difficult job to correct.
If the socket does not work, it’s time for some brute force. Put on a pair of gloves, ensure the vehicle is stable, then proceed with the task.
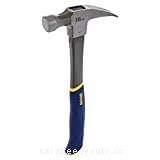
Place the boxed end of the wrench on the bolt and push on the bolt with your thumb to keep the wrench in place. With your free hand, hold the hammer and hit the opposite end of the wrench. Angle is key, so position your wrench in a way that provides you enough access to hit it with the hammer. Don’t hit it too hard or miss the wrench and hit the oil pan – as that can crack it.
For a more refined approach, instead of hammering a wrench, you can use an extra-long ratchet to gain greater leverage. A problem with this approach is that you’ll have very little room to work the ratchet, but if you have enough room to turn the ratchet by just a couple of inches, it should be enough. Once the bolt is unstuck, you can use the standard ratchet to get it all the way out.
If you have no need for a high-power impact wrench, you could tip a worker at a tire shop to pop the bolt with their air-powered wrench. Personally, I’m not a fan of using an impact wrench, but we have to explore all the options to get the job done. First, you need to check whether the impact wrench will even fit underneath the vehicle.
You need sharp reflexes to let go of the trigger as soon as the plug starts to move. Hold it for too long, and you may unscrew the plug entirely, pouring oil into your expensive wrench and even on yourself.
I’ve discovered this method recently from a youtube video and it honestly blew my mind. I’ve talked about how important leverage is – with a car jack, you’re getting more than you’d ever need.
Rather than paraphrase the video, I’ll just leave a link for you to check out and find out how this method works.
If you’ve stripped the oil drain plug in the process, there’s a couple of ways to remove it. Welding a piece of iron to it and using it as leverage usually works, but I wouldn’t recommend doing it on the drain plug as there’s not a lot of room to work with and the oil is flammable. Besides, using bolt extractors is a better way to do it, and leaves you with a handy tool to use in the future.
| Title | Price | Buy | |
|---|---|---|---|
Top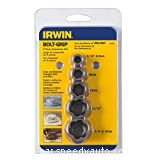 Top
Top | IRWIN Bolt Extractor Set, 5-Piece (394002) | Buy Now | |
 Top
Top | IRWIN Hammer, Fiberglass, General Purpose, Claw, 16 oz. (1954889) | Buy Now | |
 Top
Top | DEWALT Mechanics Tool Set, 84-Piece (DWMT81531) | Buy Now |
Since we’re talking about removing the oil drain plug, I can also tell you how to complete the process of changing oil. Aside from the tools required to remove and reinsert the drain plug, you’ll need an oil pan to collect old oil.
You’ll find various torque figures online, from 20 ft-lbs to 33 ft-lbs because the exact amount of torque depends on the thickness of the plug and the manufacturer’s specifications. You don’t really need an exact figure – screw it in with the ratchet, and you’ll be able to tell when it’s tight enough. The one thing you don’t want to do is continue pushing past that point, as that will cause it to get stuck again.
Because the drain plug it’s just a higher-quality bolt, you can get one for a few dollars. However, given the importance of the drain plug, I would suggest spending a bit more and getting a proper drain plug made out of hard steel.
Generally, oil is changed once a year, meaning that even after a few decades, the drain plug will be in excellent condition. If you avoid overtightening it and only use high-quality sockets to unscrew it, the original oil drain plug can last a lifetime.
Oil drain plugs are generally reusable unless the vehicle manufacturer decided to go against the standards. They might have washers or seals that need to be replaced, but generally, the oil drain plug is a single bolt with an angled head that creates a seal by itself in a similar fashion to a wheel bolt.
If there’s an oil puddle forming underneath the oil pan, it could be the gaskets or a drain plug that hasn’t been properly tightened. The only real way for a drain plug to go bad is to overtighten it to the point where threads get damaged, or by stripping the bolt head. Clean the drain plug and take a look at it from different angles, and you’ll be able to tell if it’s too worn to use.
The oil drain plug is located at the bottom of the oil pan, positioned parallel to or facing the ground. There are two things to remember – the oil drain plug may be covered by the skid plate, which you’ll have to remove entirely to gain access to the bottom of the engine. The second, and much more important tip is to not confuse the transmission drain plug with the oil drain plug.
It’s obvious when we’re talking about it now, but when you’re underneath the vehicle and looking for a bolt head to unscrew, it’s easy to make a mistake. To figure out which one’s which, just look for the oil filter, exhaust manifold, and other engine-related components above the plug. If it’s just a rounded mass of metal then that’s the transmission case.
When the oil drain plug gets stuck, there are several ways to approach the problem and get it out. The important thing is to stay safe, work slowly, and use high-quality tools to avoid stripping the bolt head. An oil change is a really simple task, so I would highly advise doing it at home instead of taking the vehicle to a mechanic.
Check out some of our related topics:
Oil In The Spark Plug Well: Symptoms, Causes, and Fixes
How To Remove A Stuck Oil Dipstick Tube
How To Start A Car After Running Out Of Oil
